In this post, I’ll explain how to replace the hinges on the Lenovo ThinkPad X1 Yoga Gen 6 convertible laptop, since I couldn’t find any guides online about it.
But first, we need to talk about canvases. You know, the kind that artists use.

Kublai: Boring! Are you doing SEO spam now too?
Hey, if you just want the repair guide, click here to skip to the bottom of this post. Anyways…
I have a canvas. It’s three feet by four feet, blank white, just waiting for a nice artistic slather of paint. For a long time, I couldn’t decide what put on the canvas, but then I had a eureka moment: Wait, the canvas has a back side too! Could that be used for art too?
So, I made a string instrument, with tuneable screws!
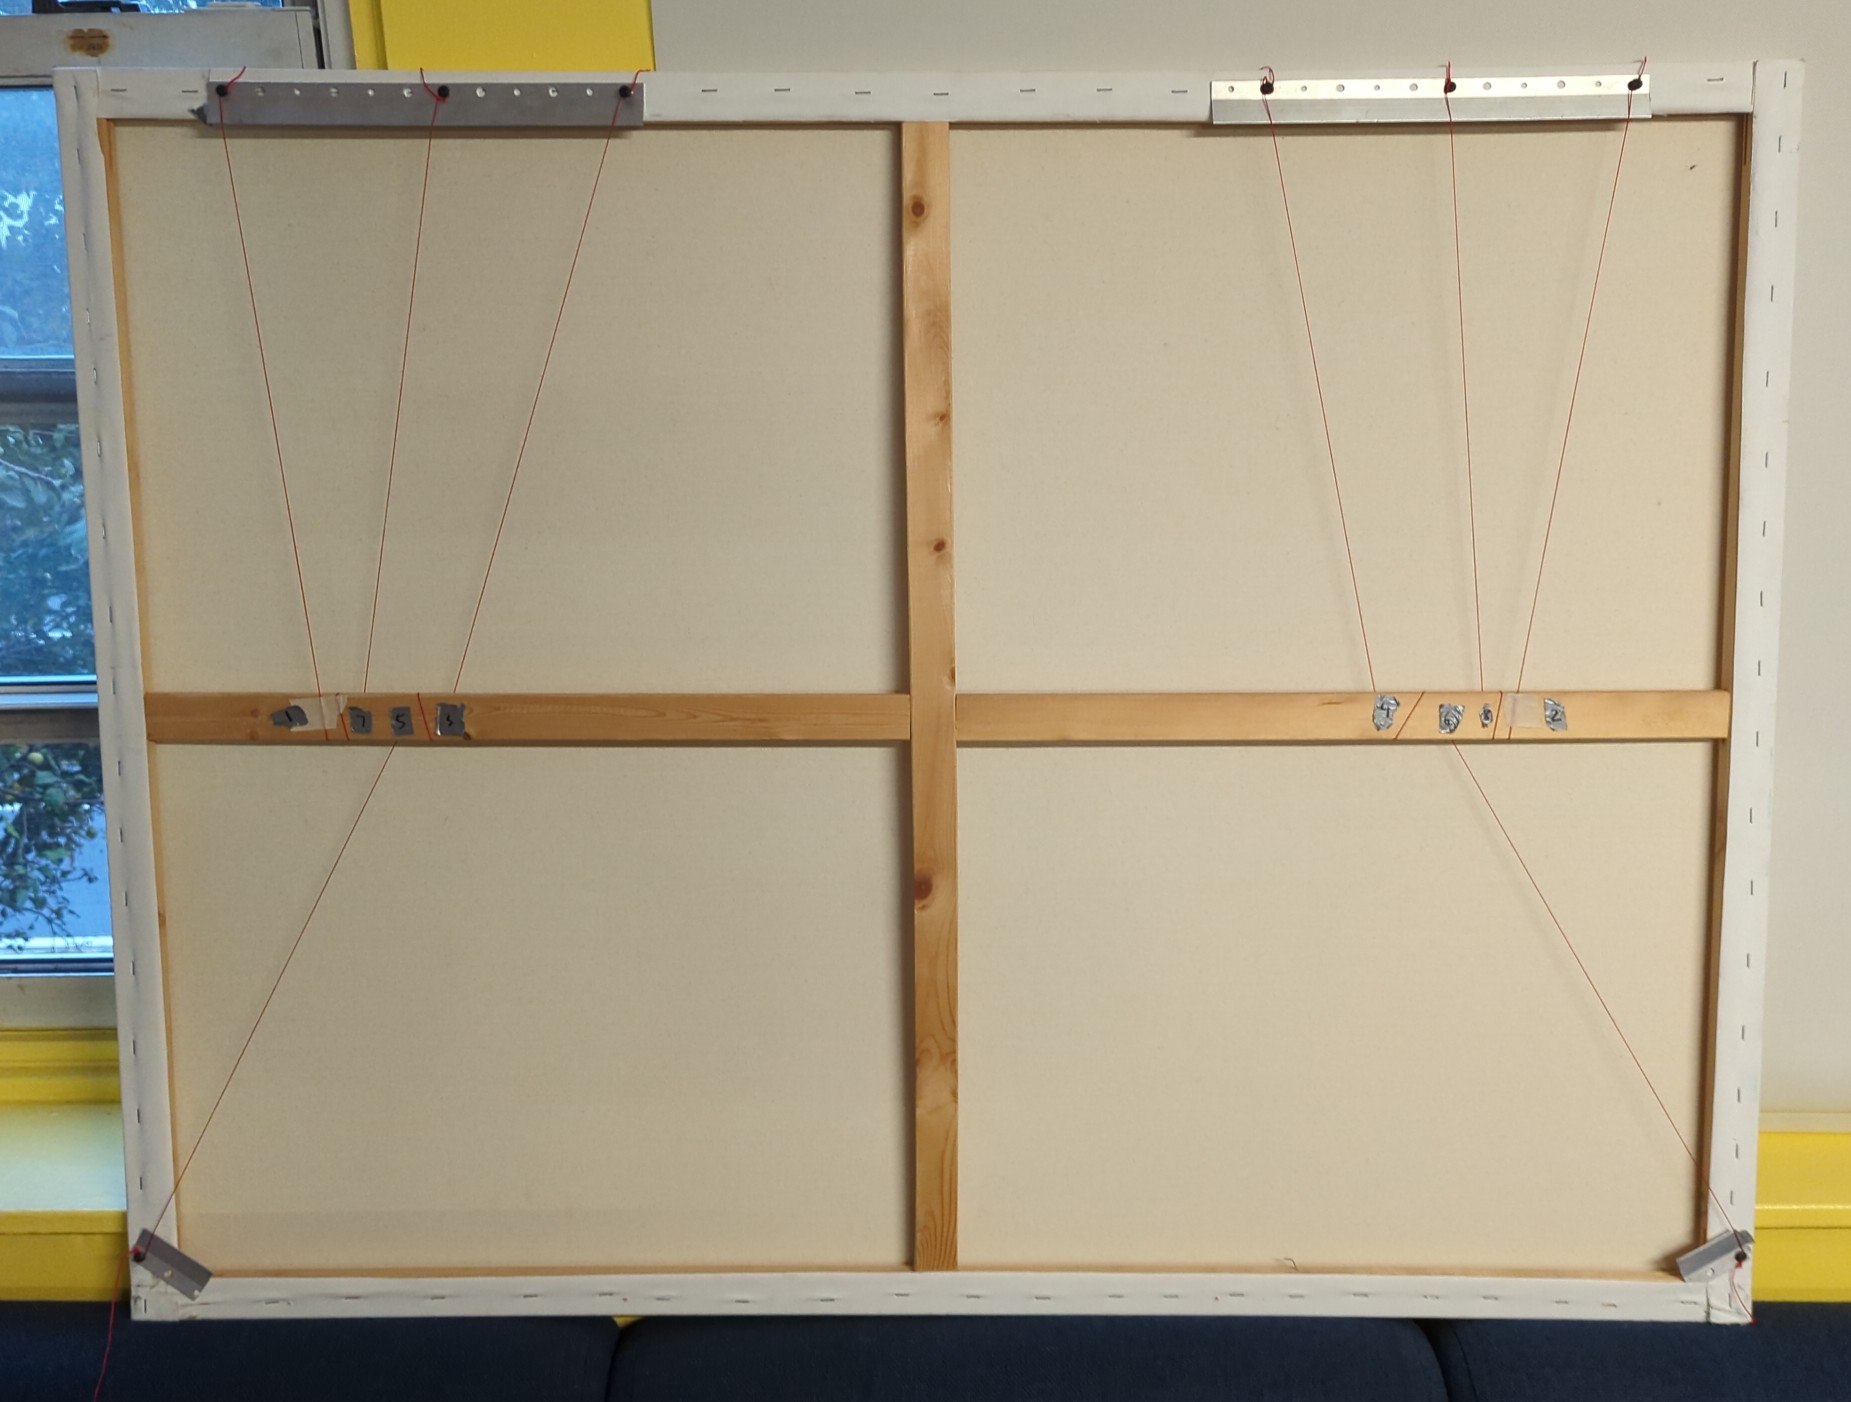
As I was tuning my new invention, moving it around, tightening screws, stretching (and breaking) strings, I heard a crash! Oh shoot, my instrument accidentally knocked my laptop off my table. Very rude, if you ask me, but eh, it’ll probably be fine. I continued tuning my instrument until it could play a satisfactory major scale.
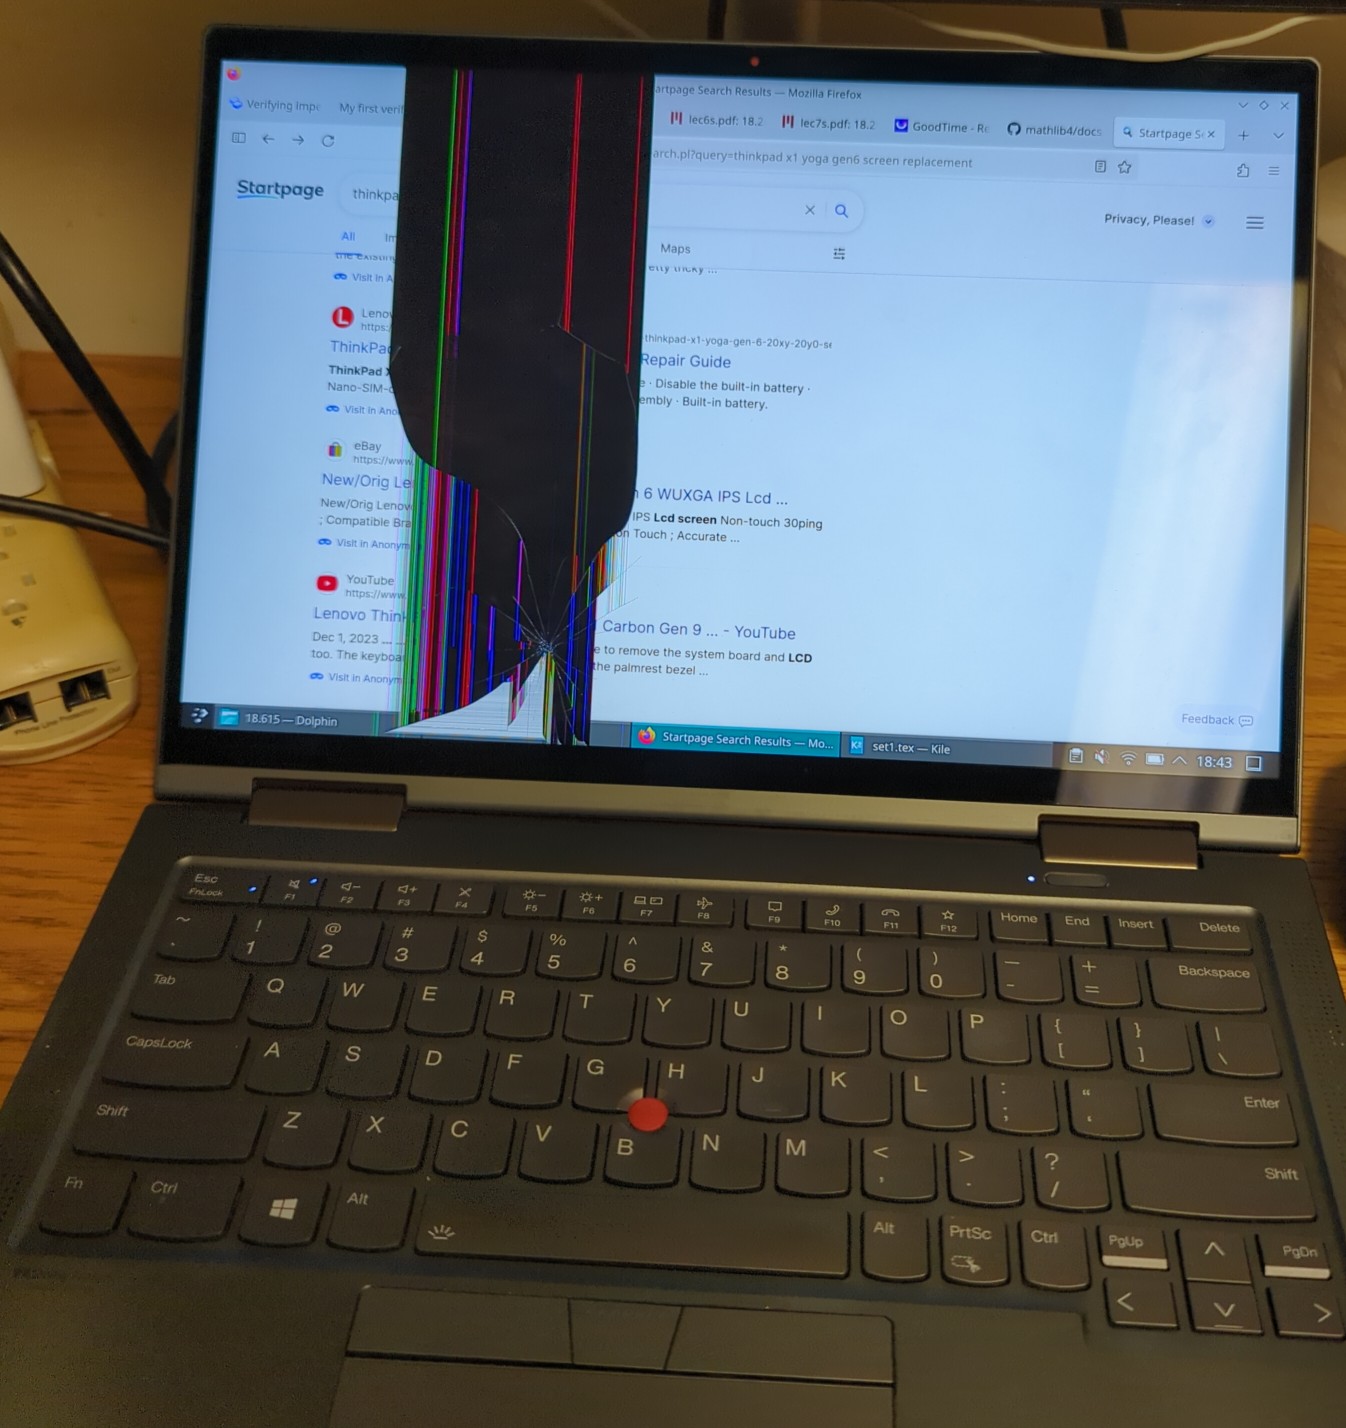
Afterwards, I turned on my laptop and… oh, nooooo…
Kublai: Oh, so you made yet another artwork using the canvas. Very abstract, very cool.
Luckily, the laptop was fully functional except for the screen, so I seized the opportunity to fix one of the biggest annoyances about my laptop! The broken screen was 4K, which sounds awesome, except you can’t even really see the difference compared to 2K with such a small screen and it drains battery life like crazy. Avoiding the same mistake, I bought a cheaper and more battery-friendly 2K screen off eBay.
The new screen (plus two hinges and two Wi-Fi antennas attached to the bottom) arrived a few days later, so I replaced the screen using Lenovo’s helpful video repair guides. The process went fairly smoothly, although I ran into two small problems. First, one of the antennas didn’t attach tightly enough to the Wi-Fi chip, so I used some duct tape to secure it. Second, the tamper detection switch fell off of the motherboard, so I originally planned on soldering the switch back on, but another person convinced me to use tape instead which worked and was much easier.
And finally, the moment of truth: The new screen works! Phew.
Unfortunately, it’s also the single worst screen I have ever had the displeasure of using. Photos cannot capture how awful this screen is. You have to see it in person.
Two words: Privacy Guard.
The new screen has a “Privacy Guard” feature which is built-in filter that restricts viewing angles so you can trade stocks on the plane or whatever. This filter works by making the screen quality really, really bad. It looks like a 3DS screen illuminated by a rusty flashlight in a haunted room, except the 3D feature of the 3DS is malfunctioning and inducing mild headaches and eye strain instead of cool effects. Privacy Guard can be “disabled”, but the filter is physically integrated into the screen, so even when it’s off, it only looks slightly less awful. Seems like something only businesses would buy, since they like useless and ineffective paranoid security features.
Avoid Privacy Guard screens at all cost! And HP Sure View screens, and whatever the equivalent is for other laptop manufacturers. Do not buy!
Anyways, there are actually four different options for my laptop model’s screen, so I happened to win the miserable “Privacy Guard” lottery as I was in a rush and didn’t look closely at the part number of the screen when buying it. Ugh… back to eBay. Time to buy a replacement screen for the replacement screen.
Since the first screen I bought was fine, other than my blunder of buying the wrong model, I bought another screen from the same seller, checking the part number carefully.
Welp, I got scammed.
The item description said it had some light scratches. It did indeed have some light scratches, OK, fine. The part number was for a non-Privacy Guard screen. It wasn’t a Privacy Guard screen, thank goodness! The item description said the screen was in “very good quality”. Yeah, the screen works perfectly. But nowhere in the item description, nowhere, did it say that one of the hinges is broken!
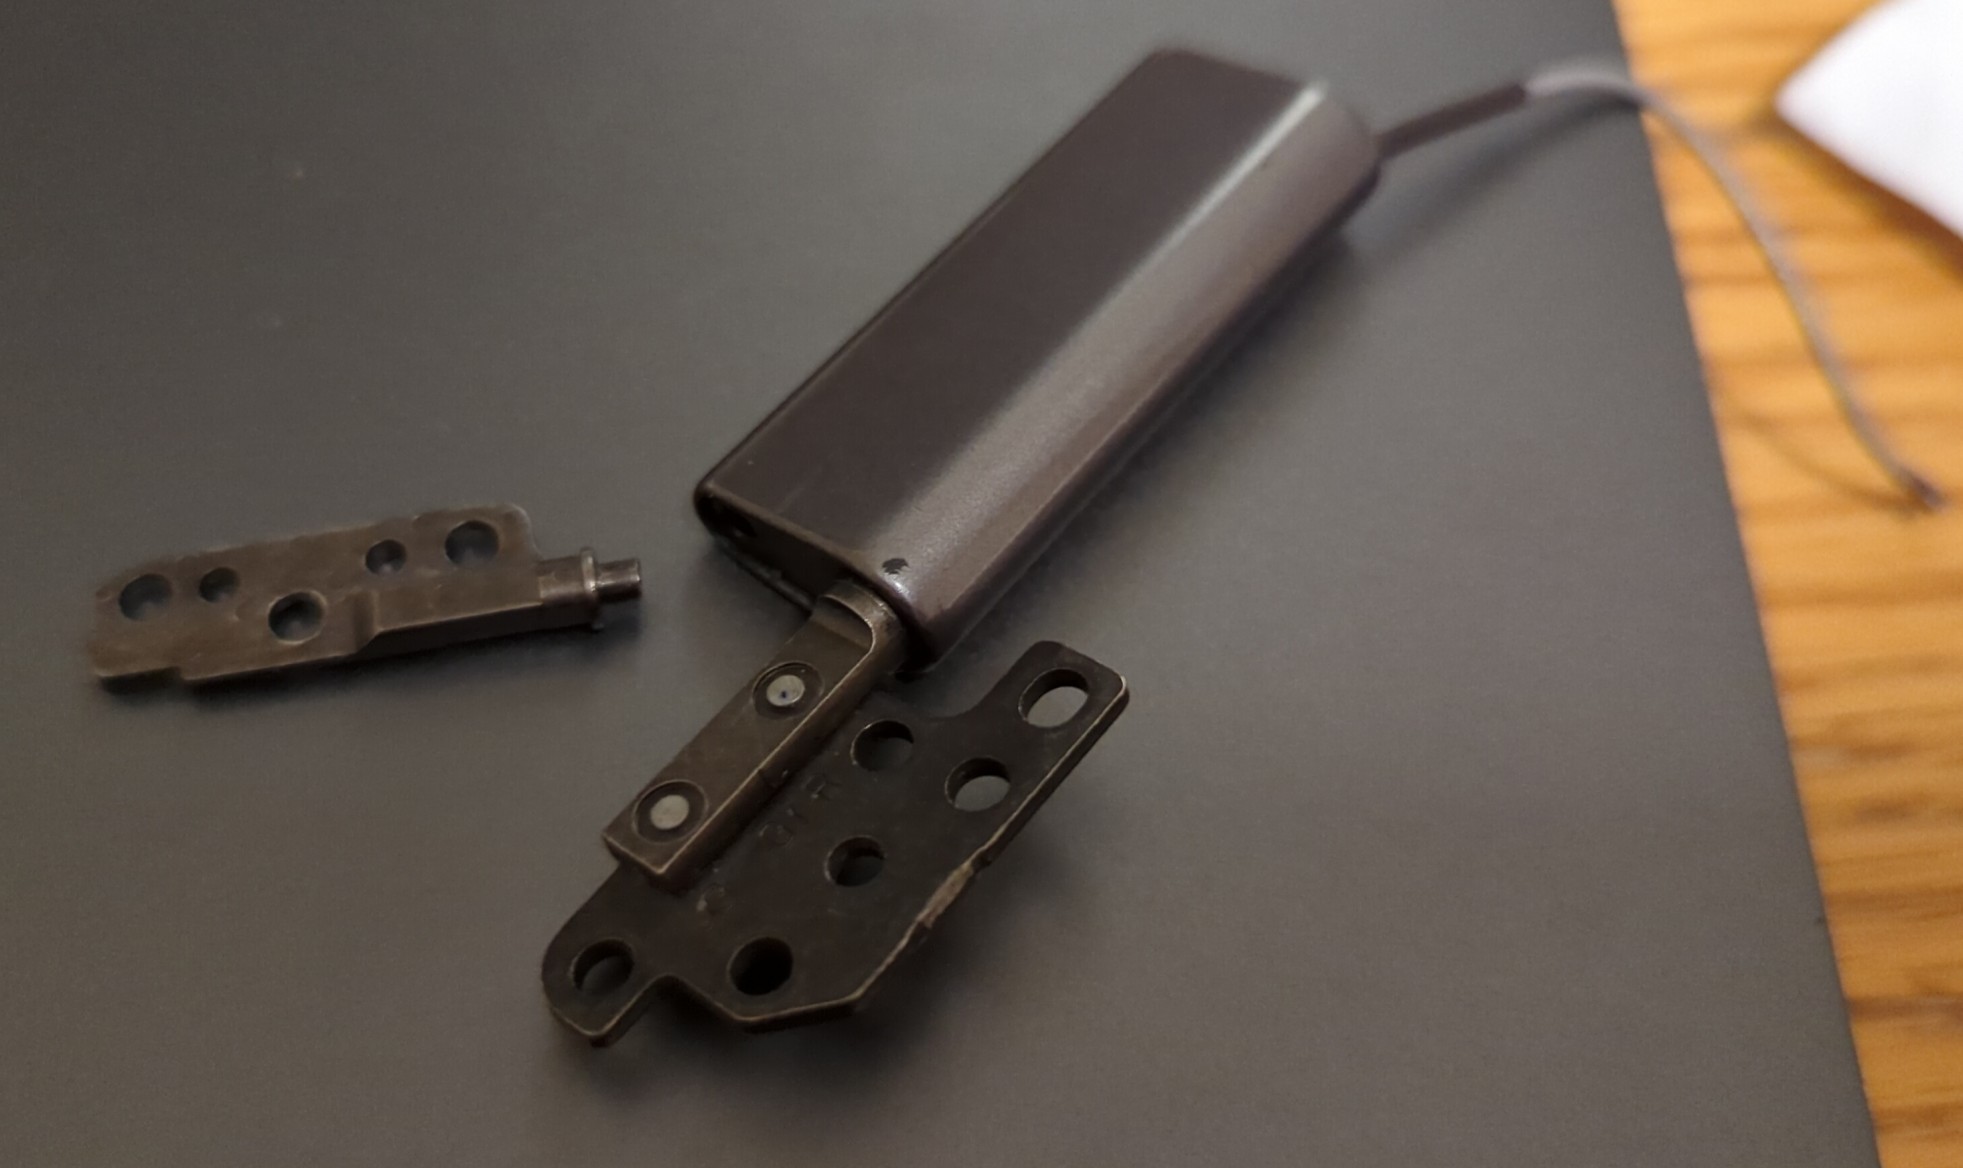
See that? It should not be two separate pieces! What a scam!
Kublai: Aaahh!! Will you have to return that screen too?
But wait! I have working hinges from my original broken screen. So, all I have to do is swap one with broken hinge! Easy as that.
Actually… not quite. The Lenovo website doesn’t have any guides for hinge replacement, and I couldn’t find one online either. But even worse, the screen itself is ununscrewable! The whole screen is held together entirely by glue, not a screw in sight! How am I supposed to disassemble it to replace the hinge? Even Lenovo prefers to replace the screen entirely just to fix a broken hinge.
Kublai: Or it’s an evil plot to make the customer pay more for repairs…
Fortunately, I wasn’t worried about breaking my already broken original screen, so I disassembled it completely and destructively to figure out a viable method for replacing the hinge.
The actual repair
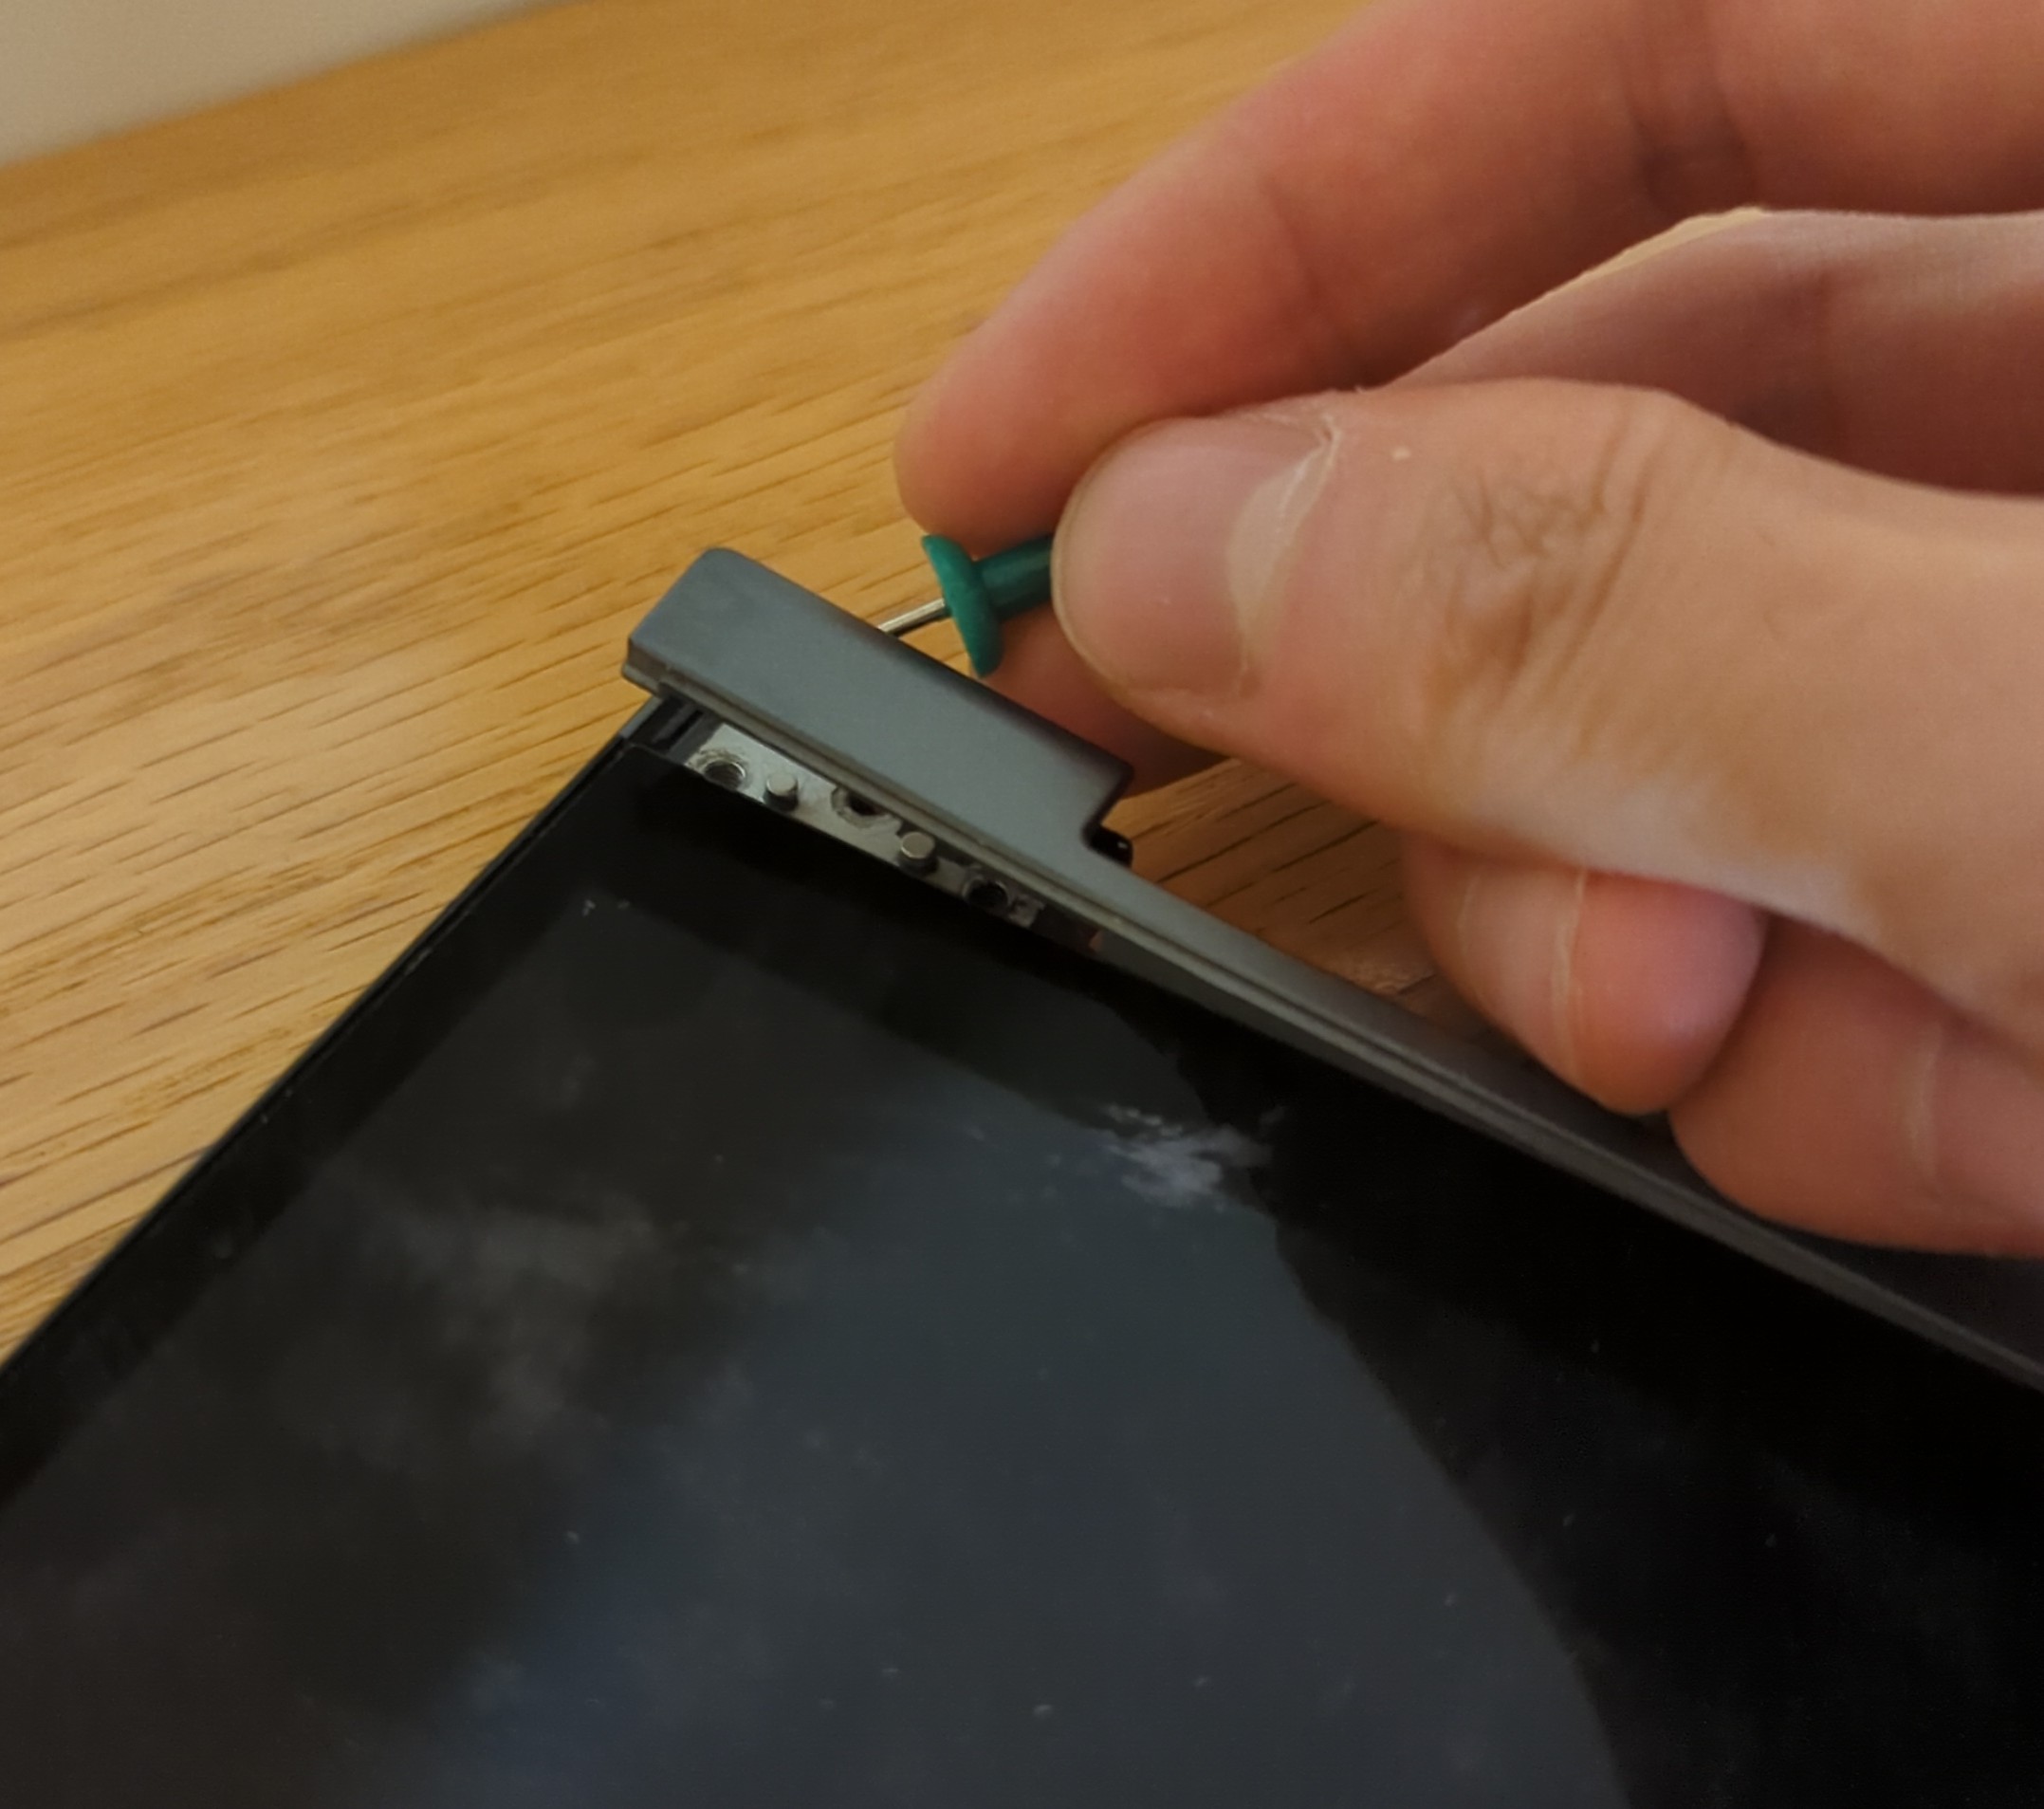
Luckily, it’s quite easy to replace the hinge. First, remove the screen from the laptop. Next, stick a thumbtack into the hole where the hinge goes into the display.
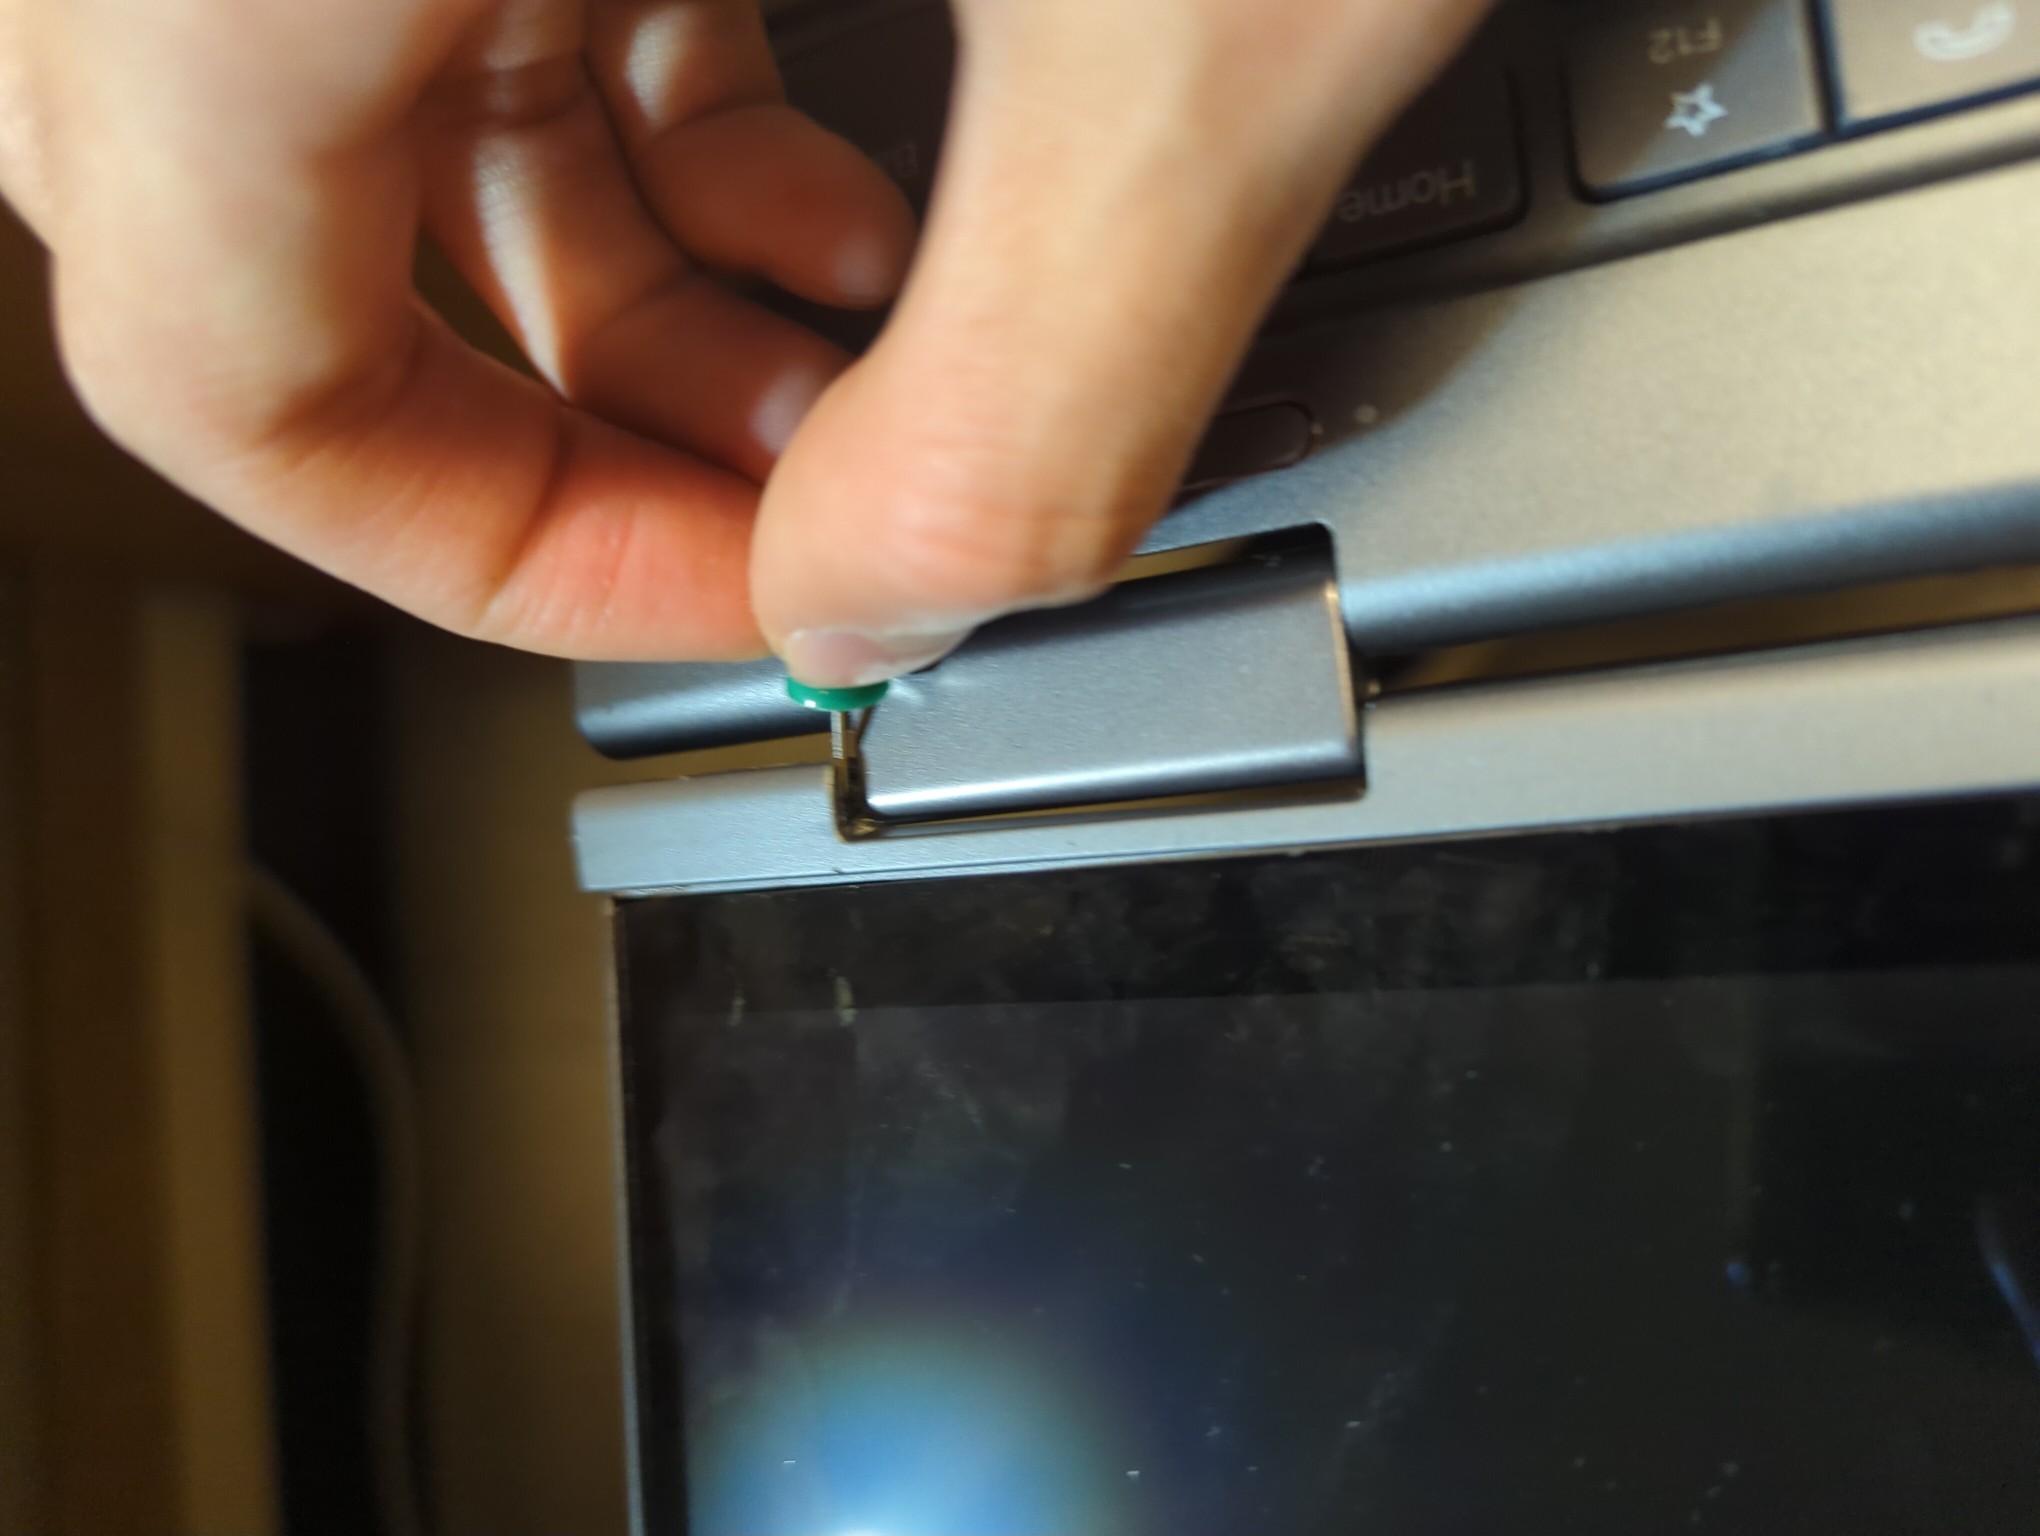
Kublai: Hey, it looks like the screen is still in the laptop! You didn’t even follow your own instructions!
OK, just pretend like I did. Now pull the thumbtack towards the edge of the screen to unglue the end of silvery metal part, and lift it up to unscrew and remove the hinge.
Now insert and screw in the new hinge, and optionally glue the metal thing back on. Don’t forget to put the screen back into the laptop. And that’s it!
Next time, I’m buying a Framework laptop instead.